After seeds germinate, use a complete houseplant fertilizer at 1/2
strength to provide nutrients. Two weeks later, use the recommended fertilizer rate on the fertilizer bottle. Over-fertilizing seedlings can easily damage and kill plants, so follow directions carefully.
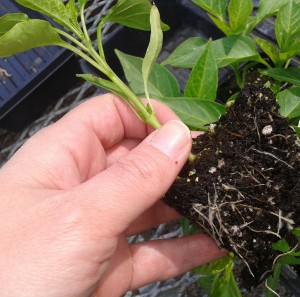
Once seedlings are large enough to transplant outside, you’ll need
to “harden” them off. This is the process of gradually exposing seedlings to cooler weather. Before you start the process, water seedlings less often but don’t let them wilt. About two weeks before you plant, set plants outside in a shady, protected place on days when weather is above 45 degrees F and not windy for 2-3 hours. Gradually increase exposure to sunlight then plant
into your garden.
Your vegetable garden needs to be ready for your plants, so add 2-3 inches of compost and work it into the soil. Then, dig a hole the size of your transplant’s root ball (area of soil and roots), and set plant in the hole. Cover around sides with soil and firm gently. Do not add soil over the top of the root ball, as this will prevent water from reaching the roots.
Once you’ve planted your transplants, curious and hungry creatures may visit. Keep an eye out for snails and slugs, birds, and rollie pollies, caterpillars and earwigs. If chewing damage appears and you aren’t sure about the culprit, take a look outside with a flashlight at night. If you find a pest and can’t identify it, take it to a local nursery and ask a certified nursery professional, or call your local Cooperative Extension Office and ask if they have Master Gardeners who can help.
For information on controlling snails and slugs, read out my post “Build Yer Own Beer Snail Trap.” Read my post “Roly Polys, Rollie Pollies and Pillbugs Oh My!” if you see these critters around. Earwigs and pillbugs like to nibble on tiny green plants. For caterpillars use an organic control called Bt. I have white crown sparrows in my garden that enjoy eating my seedlings so I cage over them with chicken wire until they are older.
I hope to hear from you about the wonderful produce you’ll soon be enjoying in your garden. Please drop me a line and/or send photos.
Read the first post in this series Spring Seed Starting 101 Part 1 of 2 here.
Comments
comments
